Not a lot to say about this day. Today was spent collecting the cellulose that was sprayed in the wall cavity around the east door. This was to show the section through our walls to communicate the amount of insulation used. Great idea- a mess to clean up. After a few trials, the discovery was made that the shop-vac was going to be the cleanest alternative. Dusty and I worked finished after innumerable empties of the vacuum- which equated to about 5 large garbage bags filled with compressed cellulose. Tied them up and called it a day.
Author Archives: brittgr
September 6.
Quote
Today was day one of the deconstruction. Driving into an empty fairground this morning was more relieving than I can explain. We began the day by discussing the order in which things would be dismantled/numbered/packaged/etc. Chris and I started with the slats in the loft… I do not remember putting that many finish nails into this thing! They were everywhere. The process was pretty painless and we had them packaged quite quickly. Next came the burlap panels and then the posts. Before we knew it, it was 3 o’clock and time to shift into thesis mode. With our RFPs due in a couple of days, we all left early to focus on the assignments happening back on campus.
September 4.
Quote
LAST SHIFT! This evening was my last time on duty at the fair. Labor Day weekend brought more people than I had imagined. Though the day was quite hectic, the house emptied early giving Ty the opportunity to coerce Mike and I into riding the Skyscraper after close. I had resisted the temptation on my walks to and from Eco, so being it was the last shift- I had to. We had all had our share of the fair- but seeing the midway lights upside-down 150′ (if I remember right) in the air was a great way to end the night with a quick thrill.
Before ending this portion of the build, I figured I could reflect a bit on the experiences had over the past week and a half…
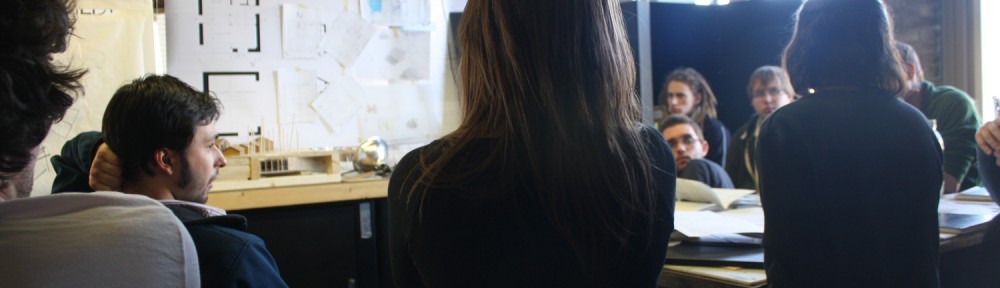
There were some interesting encounters over the extent of the fair. To name a few- the guy who compared our design to one of his recent nightmares (thanks!), the somewhat paranoid individuals concerned with the amount of glass and lack of privacy or the impressive thickness of our door that would be the perfect addition to a concrete house (or bunker), the couple who had recognized our program from a conversation they had on a flight with students (us!) on their way to SanFran last fall, the large amount of renovation/retrofit questions thrown our way- not always pertaining to the ideas used in Passive House but still fascinating all the same, the people interested in our schematic design process and how we arrived at the decisions we did (I liked those questions), and the countless questions about… the rocks.
All in all, it was a great experience. So many people, so much food. I think NDSU and everyone that has been supporting us through this whole process might really benefit from the exposure at the fair. There seemed to be a lot of genuine interest and I’m excited to see what comes off it.
Quote
Photos similar to one of the sketches I posted earlier. Interesting things happening with the little light we receive from the windows.. It’s too bad we built this thing indoors. 
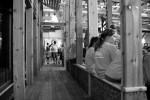
People.
Quote


Light
Image

Concrete: Complete.
Quote
The following is the process we underwent to make the concrete/glass bench currently installed in the cabin. After a few semi-successful trials, it was time to attempt the full-scale 2’x4’ panels. It was definitely still very much an experiment, but I think we were all very satisfied with the outcome.
Here it is.
1. Collect and crush recycled glass.
I work at an Italian restaurant that does not recycle glass. Instead of tossing away the many wine bottles we go through on a daily basis, I began to collect them. Once we got the okay to explore this as a product in the final design, my collection grew, overpopulating my studio… and the trunk of my car. Time to break them. I first soaked them to remove both the labels and any remaining wine, as the sugar may interfere with the adhesion of the glass to the cement. Then, using just a hammer and a pillowcase, each bottle was crushed until the shards were at a decent size. We later used a small fitted bed sheet over a sheet of scrap plywood which allowed more glass to be broken by multiple people- much more efficient.
2. Experiment.
With small molds, we first experimented with different ratios of glass, cement, concrete, mortar, floor leveler, latex additives, bonding adhesives, etc., etc… Working on a smaller scale allows you to test out the right mixture, without wasting a lot of materials. We found combining glass with just cement, water and a little bit of play sand worked best. When using glass as an aggregate replacement, the gravel and sand in concrete becomes too much.
3. Making the mold.
Carefully measure the desired dimensions. To make our molds, we used scrap pieces of wood lying around the build site. The depth of each panel is 3 inches on the front edge for added strength, 2 inches elsewhere. ½” rebar was cut to size with a hand grinder for reinforcement. Two pieces of ½ ply underneath the thinner area to help with support and to decrease overall weight.
4. The Mix.
The exact amount of each ingredient is hard to say because we used various empty containers around the site as our unit of measurement. Roughly- we used 7 parts glass, 4 parts cement, 2 parts H2O, and a handful of sand. We used a drill attachment for the mixing process. Mixing the concrete wet allows for more working time.
5. Pour.
Fill the mold with the cement/glass mix. Make sure rebar is fully covered and far enough beneath the surface to not interfere with the grinding process. Use a hand trowel to ensure mix is spread evenly. Bull float to smooth surface- we used a 2×4.
6. Vibrate.
Lightly vibrate to consolidate the concrete. We used hammers and lightly tapped the sides. There are more effective and less labor-intensive ways to vibrate the beds, so I would not recommend our method. Do this until air bubbles are no longer on the surface.
7. More Glass.
Next, seed glass on top of the concrete bed and lightly tamp and trowel, avoiding pushing glass too far beneath the surface. This way you can better control the composition of your final surface.
8. Cure Time.
Allow concrete to cure for the appropriate amount of time. We waited 8 days. Cure time varies with size of project.
9. Grinding.
Purchase the necessary equipment. You will need diamond impregnated grinding disks. The grits we used ranged from 50 to 3000, eliminating our need to polish the surface. The disks attach to your stand hand grinder. We had access to some heavy-duty equipment called the StoneMedic, which made shortened the grinding process. It is possible to do it by hand, just make sure your surface is level.
10. Finish.
Depending on the use, there are many different ways to finish the end product. Our bench, we did not finish because the depressions left (from the concrete not being fully consolidated) were not an issue for us. If it were to be a countertop, I would recommend using a concrete sealer if the surface is completely smooth or a heat resistant epoxy/resin to fill in the imperfections and help with sanitation issues.
11. Installation.
DONE! Provide appropriate support and install.
-Pictures on their way…
On-site sketching exercise. 08.18.11
Quote
Though we have been thoroughly documenting our work with photos, we decided to take a moment to capture some interesting perspectives, details, etc. through some quick sketching.
Sketches by- Nic P., Dusty, Melissa, Luke, Paul, Andrew, Ty, Lyle, Krys, Brittany and Paul again.
Tuesday, right?
Quote

Today was a good day. Rough start after a late night… Coffee. Seeing everything coming together gives everyone extra energy/motivation.
Kris and I finished up the slatted area of the kitchen then after a little sketching and discussion on the size, spacing and orientation, we began to assemble frames and remove the seams from the bags. Stretching the burlap was a fairly smooth process, after the realization that my hands were more successful than the canvas pliers, intended for stretching canvas- and tearing burlap. By the end of it the floor was covered in the tattered remains of unused bags, some coffee bean stragglers, staples, etc, etc.. Messes follow me.
With the panels up in place, it made it easier to visualize some options a few of us talked about earlier to resolve the 5 inch spacing of our balusters. The night ended at a decent time. I went home and fell victim, yet again, to a 4-hour marathon nap attack.. Looking forward to finishing the guardrail assembly tomorrow. So. Close.
