How to measure a day. . .

Quote

How about we measure the last dismantle day as every good thing needs to come to an end.

Saturday was our last day of dismantle, all of the walls were down and all that was left was the floor framing and the sheathing that was place on top of it.  It doesn’t really seem like a hard thing to do but let me tell you it was no easy task.  The flooring was the first thing that we put down, and at that time it was probably the first time most people had ever built anything ever, and making sure things were perfect is what we do best.  So needless to say there were a lot of screws and they were sunk, and then since so many people had walked over the top of it that the OSB had been smoothed so much that the holes for the screws were almost hidden or unseen.  The OSB had also been tongue grooved together so we had to start at one end and pull it up one piece at a time.  However, since we were determined to get it finished it did not take too long to get the flooring and the framing apart and put into groups and labeled.  It was kind of hard to see the structure completely gone, it has been such a long, amazing ride, that I learned so much from and an experience that will forever change that way that I construct and look at designing.

How to measure a day . . .

Quote

The best word that would describe this day would be unknown and awe.

I missed the first day of the dismantle because I had to be in Fargo for school, so when I got back on Wednesday morning it was almost unreal how much of the house had come down already.  The dismantle went so quickly that by the time I got to the site on Wednesday morning the interior was almost done, and the trim around the windows was almost off as well.  I started taking the blocking off from around the windows and then went to taking off the exterior siding from the west side.  It was a very quick take down that day.   The dismantle actually went a lot smoother then I had anticipated, everything was organized so when you would take something down from one part or another of the building you would wrap it up and label it.  It had made things a lot easier, except that we are going to take a lot of time moving things around more then anything, but this is a minor problem compared to the ones we could have.

How to measure a day . . .

Quote

In 12 days the students have now become the professors.  Educating the masses on how being conservative in they way they built and being efficient in their energy use would help them out in the long run.

The 12 days of the Minnesota State Fair were filled with explaining the way that the passive house worked and trying to educate those who were so convinced that it would not work.  I think repetition would also be another word that would describe the experience among a few others of course.  The state fair was a multitude of what are the rocks for? How does the house heat itself in the winter?  How do the windows work?  Can you retrofit any of this in an existing house?  How much does it cost to build, compared to a typical house?  Will you explain everything to me?  These were just a few of the questions that were asked on a regular basis by almost everyone who walked through the house.  It was an experience that will for ever change the way that I think about building things and the way that you can reuse and recycle materials to do so.

How to measure a day . . .

Quote

Today could be measured in metal, lots and lots of metal and perhaps a little acrylic too.

So I got the task of putting the acrylic up in the East side door to showcase the framing of the walls and the insulation that will be in there, since I have worked on a lot of the windows.  It all started will an aluminum L- shaped piece that was 6’ long.  I had figured out that we would need 24 pieces that could brace the acrylic.  I marked out all of my measurements of 3” apiece and I would just cut in the middle of the mark so that each piece was roughly about the same size.  The grinder and I were not friends it seems, I did end up getting all of my pieces cut but they were all jagged and parts were kind of melted by the grinder.  The next solution was to find somewhat to even out the sides; well this brings me to the file.  I filed 24 aluminum pieces down to make sure they were even on the ends, this took all day and during this duration of time I got a slight sunburn on my shoulders but each piece got done and looked good.  As, Nic and I were putting up the acrylic we noticed that parts were starting to bow out so we ended up using more on braces then I originally intended, to make sure that it was flush on all sides.  At the end of the task, the door way looks great, but the upper window needs a little more security, I guess we will just have to wait to see if tomorrow brings more aluminum or not.

How to measure a day . . .

Quote

In frustration, would be the one and only word that could sum up a day like today.  To bad my frustration was not toward anyone in particular but an object or better yet a window.  This is not just some ordinary window oh no, it is the window that seems to be the most difficult and stuburn thing in the entire world.


My day started out fine, I was told to close up the window like the all the rest of the windows half plywood, half OSB, and than we would but a strip of pine in the middle to act like framing since there wouldn’t really be a window going in this rough opening.  So, I started to measure the OSB and got it in place and screwed it in, when I was informed that I needed to tape the window.  Well, this isn’t a problem right, one should not be so sure because I had to tape the outside OSB to thesheathing in the interior.  Well, this ment that I needed to remove and cut in half the pieces I has already made,  take off the siding on the interior wall, remove a couple of the 2 x 4’s from the side of the window and pry open all four sides of  the window.  This was not an easy task at all, it took about 5 hours to complete and the tape was probably the worse part.  However, it got finished and the window now even has a membrane on the exterior, and the pine in the center to make the window not the best looking thing in the world but a very well insulated and protectedrough opening.


     Taping of the East window

 The window finished 

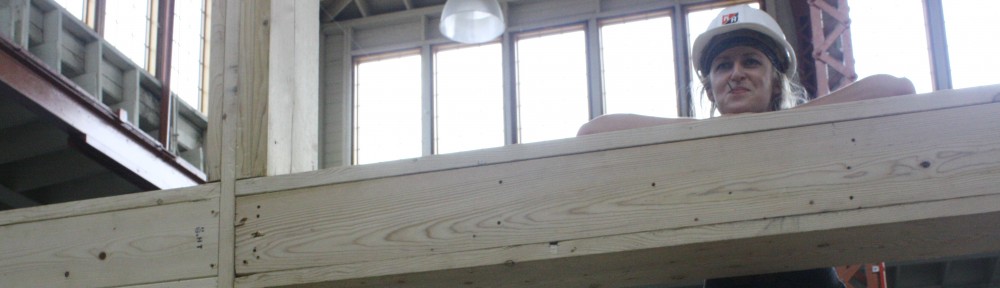
 The uneven fit of the center pine 


How to measure day . . .

Quote

In the amount of very fine sawdust on my clothes, or the laughs from the equipment I waswearing, or better yet how about with Orbitz gum.


Once again this day was filled with nothing but the task of trying to get all of the sidingsanded because we still needed to sand the boards for the shelving unit and the interior siding as well.  As the day continues Dusty and I sanded away and since I wanted to be fully protected and I had accumulate a lot of stuff from John so that I could sand and not get sawdust everywhere on me.  Even though a lot ended up on my clothes I was wearinga breathing mask, and tinted skiing goggles, along with a pair of mechanic gloves.  One of the times I was bringing in some wood my mask was down and my goggles were on the top of my head and John told me I could be in the Orbitz gum commercial : “For a dirty mouth clean it up  – For a good clean feeling no matter what”.  Apparently, I was more covered in sawdust than I thought I was.  Well,besides me being covered in dust from head to toe the siding was completed and honestly it feels pretty great not to have to sand anything for away


. 


How to measure a day . . .

Quote

How about measuring it in my own height?  That is an accurate measurement right or at least closeenough.


This was the beginning of a tolling task that would end up taking 4 days to complete all together; this task is none other then sanding the siding.  Earlier in the summer a fewpeople took down Ty’s granary, which then became the recycled lumber for parts of our structure mainly the siding.  Since, it was being reused from an older facility it needed a little but of a new shine, and that new shine would come from the hand sanding each piece with the belt sander.  While we were sanding it we even put the pieces into piled to help with over using certain sizes f the lumber.  The groups that Lyle and I came up with were small, medium, and large.  A few days earlier we inventoried all of it so we knew how long the longest pieces were and how short the smallest were.  Our small pieces went from 2’ – 4’, large 14’ to 16’, and for those we were not to sure about as long as the piece wastaller then I was it was a medium.  So apparently, a high is actually a good indicator ofanaccurate measurement.


  Pre sanding recycled lumber

   The sawdust that accumulated

 Some polished siding

 The siding on the structure 


How to measure a day . . .

Quote

No nails, or hours or scratches, or cuts of wood can today measured in but the hard work from everyone putting in more then enough time to make sure that everything is exactly correct to the 1/16th of an inch.


In the past couple of days things have been moving on fairly quickly, we are ahead of schedule and keep on cruising.  Thus far we have all four walls up and almost completelysheathed, just a few parts at the way top left to do.   The inside North and East walls are framed and the framing for the bathroom is complete as well.  The greatest achievement for the day would be place and securing the main top beam for the roof structure.  I started this morning placing sheathing on the West side wall with Brittany, we completed as much as we could do while on the scaffolding but the cabin is higher then both of us can reach even with added high.  Then we moved on to cutting the 2×8 for the loft floor.  After having a great lunch under a neat by tree we got right back to it, working on the interior framing for the East side wall, and finishing the day off with the framing for the bathroom.  The day has been one of the longest thus far but definitely did not feel like it since everyone was busy on the tasks that needed to get finished.  Now we can get a good start on the things that we need to do for tomorrow.


 Sheathing South exterior side  Sheathing North interior side  Sheathing North exterior side


How to measure a day . . .

Quote

In hours worked? In the number of 12’ 2 x 4 that had to be cut to be actually 12’? In the amount of times you will cut one piece of wood to fit around a column?  In the battle wounds from working?  Or in the satisfaction of being done?

Well to answer that burning question it would be 12 hours, 102 12’ 2×4, 6 cuts, 9 minor scratches, and the price to seeing how far we have gone in three days is absolutely priceless.

With the direction of our fearless leaders we were kept focused on the tasks on hand and all worked diligently on making sure that things got completed in an accurate manner. Out in the hot sun Brittany, Lyle, Paul, and I got the pleasure of cutting 12’ 2×4 for the vertical supports in the walls.  While we were waiting for the framing to be finished for the south side door Paul and I tried to cut a piece for the flooring around the East side column and ended up having to cut the thing 6 times to fit in the not so square placement, while each times claiming it was going to be the final time at the saw.  By the end of the day even though it was a very long day, it was also a very productive day.  In a nutshell; we got thesouth and west side all framed up and built up to the top headers, all the columns are in place, level, and correct, and the east side wall is all framed and half way in place.  We bleed just a little, and yes there was definitely sweat on every bit of everyone shirts, but there was absolutely no tears for the accomplishment of the day was far to great to have anything else matter besides the extraordinary building that is being built with our hands, and the result of three days of very hard work.

    South and East side wall                     End of day 3 

How to measure a day . . .

Quote

It wouldn’t be the number of sheathing that was placed on the floor structure but rather the number of pieces of wood that would fit on the shelves made for the storage compartment.


The first day was filled with an abundance of wood, wood and more wood.  After, we had the first meeting for the day we got to work in our groups, John, Luke and I, got the pleasure of doing  a whole bunch of odd jobs.  Our first task of the day was to build a table for the chop saw, which  sounds to be simple but given our first thought was to use a pallet for the top it was more challenging then it needed to be.  The problem with using the pallet was that it made the structure of the table really unstable but we figured it out and the table works just find with the chop saw attached.  After the little job of the table we got the pleasure of unloading the large Budget truck full of wood.  However, we needed to make sure that the storage container everything was going into would have enough room to hold everything in an organized way.  So first we built a shelving unit with three parts to it so that each type of wood could have it’s own area, the tools could be organized when put away, and there would be a place to put our tool belts when we were done.  Then, we made an assembly line and unloaded the truck into the container and everything fit in its designate place and looked very well designed