
-Ty
-Ty

-Ty
A Small Space is a Small Space
Today was a relatively calm day at the fair. It was pretty much overcast all day and as I boarded the bus at the MN department of education I thought perhaps it won’t be so crazy. Yet the overcast weather didn’t seem to stop the crows at all. Of course there probably was a smaller amount of people at the fair, but as soon as they try to fit in the 600 SF passive house it always seems like a lot. I guess I’ll look forward to a consitent work load until the fair starts.
Notable People
A couple of notable people talked with me today, and besides the kid that seemed to be imitating barn animals, I think its worth mentioning. For the most part I’ve been very impressed with the people I’ve talked to. Not too many of them are against the work we are doing, or write it off right away with out even thinking about it. In fact most people already have some knowledge about a particular system or window or idea already and really get engaged talking about it. What follows is a small selection of people.
Remodel Guy
A middle aged guy pulled me aside and after confirming that I was part of the project said he needed to replace the siding on his house and asked what he could do at the same time to make his own perform better. We talked for a while about what his options might be, how taking the opportunity was a good idea, and, what surprised me, we talked most about the specific details of how these solutions should be constructed. This wouldn’t of surprised me. I didn’t come off as some one who was going to do the remodel himself, rather as someone concerned about how the remodel would be done. After our conversation he was very excited and rushed off with a manner that might of convinced me that we was going to start the project as soon as he got home.
Idea Guy
This Guy hung around the passive house for a while and I kept running into him in different locations and parts of the structure. As was a bit older, had a pretty pronounced beard and above all a lot of ideas. He didn’t put them forward right away, he was very open to listening to what I had to say, and he was patient in his questioning. After we would talk for a little bit about some aspect of the building he would always pause for a second with his finger over his month, apparently in deep thought, and then point at what ever we were talking about and suggest an idea. Many of his ideas related to thermal massing or each structures and most of the time he would question me in a manner that left little room for a contradiction. I rather enjoyed listening to his idea and I’m sure he has been thinking about these things for a while.
Undercover Guy
As Ty and myself were talking casually on the east side of the building a man asked us if we were part of the project, we said yes, and he slowly worked his way up to a question I’m sure both Ty and I we surprised by. “what is the fire rating of your walls”. In the moment our only response was what ever code is. We were both a bit worried that the guy would get on our case about not knowing it or something, but he actually smiled and started talking about the importance of his question especially when new materials are being used. He was particularly interested in the foam and we talked for a bit about it. After our conversation he said he really enjoyed the project and then admitted that we was a building inspector. He was very enjoyable to talk to though and instead trying to put down the new construction methods he really wanted to know more about it and figure it out. This was perhaps my favorite conversation of the day.
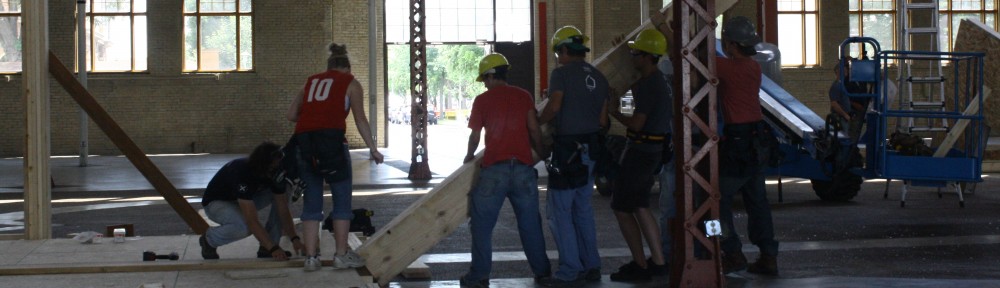
Day 18 – I started today by working on the redwood flooring on the south side of the building. By using the speed square/skill saw technique I was able to clean up all the red wood edges quickly. Lyle and I then proceeded to work on the installation of the decking. At first I thought Lyle’s method was insane and slow, but so often do I eat my words. It ended up saving a lot material that we could use later on other potential parts of the house.
The kneepads I found oddly in my car work out great for this type of job. I was able slide around and work productively. With the knee pads one could do epic power slides around the building.
Goal: All work and no play makes Jack a dull boy, have a bit of fun from time to time
Day 17
Siding is FINISHED!!!! We were able to finish the exterior siding today. First Melissa and I worked on the North side finishing the small amount on the west corner. Then Dusty Nic and I powered through the East side.
I was the cut man using a speed square and skill saw to make straight edges. Chris A taught us this cool trick. Dusty was the left measurer and Nic would draw the angle for the peel away. I was really proud of how our crew hammered out this late night project.
Goal: Develop your own systems
Days 13 – 14
The interior siding has been a ton of fun. First we got to drive out to a cabinet shop to use a time saver. We did the work that the sanders took 3 days to do in about 3 hours. I probably in hailed a little too much sawdust. Otherwise the siding went fast.
For this job we had to use a fair amount of ladders to reach the higher sections. The only tools we needed were a chop saw, tape measure, pencil, finish nail gun and from time to time a little steel persuasion (Hammer).
Goal: Know what you are supposed to do instead of being told what to do
Days 11 – 12 the South siding went great, we were really productive and praised at the results. Now the West side did not go so well. Yes, it started well and dandy with Luke, Dusty and myself. We were able to plan how we wanted it to work and ended up making a cool detail we call the zipper on the NW side of the building.
As we continued up the wall we ran into a problem. The crew got larger and new ideas were applied then misapplied then applied. In other words we needed to slow down and figure out the next plan of attack instead of making it up as we go.
In other news my tool belt sort of exploded. As it turns out the placement of the crowbar slowly tore away at the securing straps. Lucky for me I have been doing a lot of siding and finish work were all we really need is a tape measure, pencil, speed square (optional) and a finish nail gun.
When everything was said and done the West wall looked great and I am glad people do not have to see the small amounts of frustration that went into it.
Goal: Try and keep the same crew through the duration of a job
Day 10 – The ROOF. . . . It was disgusting how much I sweated on top of the roof doing the sheeting. I think it was the combination of the south side, inside another building with ceiling ventilators and my questionable fear of edges.
Having water that was the key to working on the roof. Also Chris and I jerry rigged a way to keep our drivers from falling on our classmates. We used handle straps that are located on our tool belts to attach the drivers to our self.
Goal: Drink lots of water when working in high places
Day 9 – Andrew and I have been up on the double scaffolding installing the TJI rafters. As Andrew says we have to do the harness dance (Insert funny music). Wearing the harness will slow you down quite a bit, however it will offer a little safety. If you watch Camera A on Day 9 you can see us doing the YMCA.
For tools the addition of a block of wood helped to form the metal bracketing that we mounted on the LVL.
Goal: Do not fall when high up on scaffolding
Day 8 – I have been cutting to long. . . It kind of sucks when the wall some how gets bigger while I am cutting. . .
Goal: Have beer at home, just in case
Day 6 – 7

The common theme on the job site is working yourself out of the job. We always are joking about it until we cannot work anymore.
I started framing out the west window, once that was complete I was out of the job. Moving over to interior sheeting allowed me to have days of productive work. However The use of my tool belt was limited. On day 7 I didn’t even wear it because I was the cut man. Personally I have never like the skill saw, I thought it to be imprecise and wild. After a day and a half on the skill saw, I loved it. When done right the saw is quick and effective.
Goal: Make sure hearing protection is available if cutting for long amounts of time
Day 5

We are now switching to framing work on the east and west wall. The newest addition to my tool belt was the framing plans. Since there were only two sets on side, it was always tiring trying to locate them. So I printed my own. We have found a great location for our crowbars. Located on the right side of my belt. You can see that I have a large amount of nails in my right pocket. This was a case of just picking up the nail gun trying my best. Now I can say I am pretty comfortable with one, considering my limited use.
When we raised the north wall, it gets really heavy if you have the highest handgrip.
Goal: Get better adjusted to tools I have had limited use of, namely: skill saw, finish nail gun and saws-all
Day 4 –

Today involved finishing the large column work on the south, east and west sides. The large 36-watt driver was a force to recon with. It imposed its will upon any screw that got in its way, however it was rather heavy. It was the only tool that could sink the 6-inch screws into the columns. We started attaching the headers after the columns were lined up and true. For the header work I switched to a smaller impact driver. This little driver did wonders even though I never sounded very nice.
Goal: step up for a job where ever and when ever I can
Confucius wrote: “Learning without thought is labor lost; thought without learning is perilous.”

Progression through experience, already changes are being made on my belt. The hammer as you can see has been moved to the right side of the belt so that it is more easily accessed. I have added a water bottle that can be easily used because the day has been getting progressively hotter. The spilt pockets on the left side have been over flowing with screws. Lastly I have my drill gun hanging on the left side. This does add extra weight but in order to be working you need every tool that can get the job done.
Day 1 started by doing some less then fashionable jobs, so I am changing that.
Goal 2: Stock my belt so that I may step in and do any job available.
These are a few models Pauly D and I came up with for the entry bay:
 The full scale mock-up Shading Bay next to the scaled models:
 Again…:
 This was the drawing board that we used to work out ideas for the tension system:
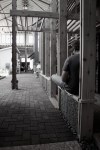
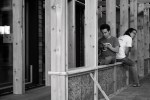
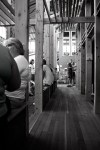
Photos similar to one of the sketches I posted earlier. Interesting things happening with the little light we receive from the windows.. It’s too bad we built this thing indoors. 


The following is the process we underwent to make the concrete/glass bench currently installed in the cabin. After a few semi-successful trials, it was time to attempt the full-scale 2’x4’ panels. It was definitely still very much an experiment, but I think we were all very satisfied with the outcome.
Here it is.
1. Collect and crush recycled glass.
I work at an Italian restaurant that does not recycle glass. Instead of tossing away the many wine bottles we go through on a daily basis, I began to collect them. Once we got the okay to explore this as a product in the final design, my collection grew, overpopulating my studio… and the trunk of my car. Time to break them. I first soaked them to remove both the labels and any remaining wine, as the sugar may interfere with the adhesion of the glass to the cement. Then, using just a hammer and a pillowcase, each bottle was crushed until the shards were at a decent size. We later used a small fitted bed sheet over a sheet of scrap plywood which allowed more glass to be broken by multiple people- much more efficient.
2. Experiment.
With small molds, we first experimented with different ratios of glass, cement, concrete, mortar, floor leveler, latex additives, bonding adhesives, etc., etc… Working on a smaller scale allows you to test out the right mixture, without wasting a lot of materials. We found combining glass with just cement, water and a little bit of play sand worked best. When using glass as an aggregate replacement, the gravel and sand in concrete becomes too much.
3. Making the mold.
Carefully measure the desired dimensions. To make our molds, we used scrap pieces of wood lying around the build site. The depth of each panel is 3 inches on the front edge for added strength, 2 inches elsewhere. ½” rebar was cut to size with a hand grinder for reinforcement. Two pieces of ½ ply underneath the thinner area to help with support and to decrease overall weight.
4. The Mix.
The exact amount of each ingredient is hard to say because we used various empty containers around the site as our unit of measurement. Roughly- we used 7 parts glass, 4 parts cement, 2 parts H2O, and a handful of sand. We used a drill attachment for the mixing process. Mixing the concrete wet allows for more working time.
5. Pour.
Fill the mold with the cement/glass mix. Make sure rebar is fully covered and far enough beneath the surface to not interfere with the grinding process. Use a hand trowel to ensure mix is spread evenly. Bull float to smooth surface- we used a 2×4.
6. Vibrate.
Lightly vibrate to consolidate the concrete. We used hammers and lightly tapped the sides. There are more effective and less labor-intensive ways to vibrate the beds, so I would not recommend our method. Do this until air bubbles are no longer on the surface.
7. More Glass.
Next, seed glass on top of the concrete bed and lightly tamp and trowel, avoiding pushing glass too far beneath the surface. This way you can better control the composition of your final surface.
8. Cure Time.
Allow concrete to cure for the appropriate amount of time. We waited 8 days. Cure time varies with size of project.
9. Grinding.
Purchase the necessary equipment. You will need diamond impregnated grinding disks. The grits we used ranged from 50 to 3000, eliminating our need to polish the surface. The disks attach to your stand hand grinder. We had access to some heavy-duty equipment called the StoneMedic, which made shortened the grinding process. It is possible to do it by hand, just make sure your surface is level.
10. Finish.
Depending on the use, there are many different ways to finish the end product. Our bench, we did not finish because the depressions left (from the concrete not being fully consolidated) were not an issue for us. If it were to be a countertop, I would recommend using a concrete sealer if the surface is completely smooth or a heat resistant epoxy/resin to fill in the imperfections and help with sanitation issues.
11. Installation.
DONE! Provide appropriate support and install.
-Pictures on their way…
